
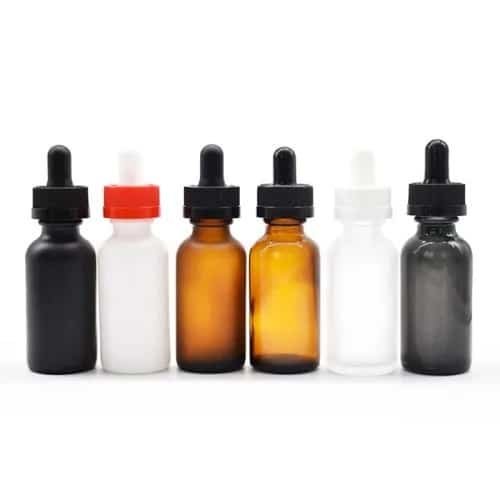
Step 0 – Initial Inspection & Rinsing (Do This First)
Before jumping into sterilizing your new dropper bottles, take a moment for an initial inspection. Check each bottle carefully for any defects like cracks, chips, or misshapen parts that could affect their seal or safety. Also, look out for cardboard dust or packaging residue stuck to the bottles, especially if they arrived in bulk.
Smell the bottles—new plastic or rubber parts might have a plastic or chemical odor that needs attention before use.
If you’re handling bulk orders, a quick pre-rinse protocol is a smart move:
- Rinse all bottles and droppers under warm running water to remove loose dust and particles.
- Avoid soap at this stage, as residue can affect taste later.
- Drain and lay them out clean side up before moving on to your chosen sterilization method.
This initial step ensures you start with bottles that are physically sound and free from surface contaminants, making your sterilizing effort more effective.
6 Proven Methods to Sterilize Dropper Bottles (Ranked by Effectiveness)
Method 1: Boiling Water Sterilization (Most Popular Home Method)
Boiling water sterilization is the go-to method for most people wanting to sterilize glass dropper bottles at home. It’s simple, effective, and doesn’t require special chemicals or tools.
Step-by-step:
- Inspect and rinse the bottles and droppers first to remove any dust or residue.
- Fill a large pot with enough water to fully submerge the bottles and pipettes without crowding.
- Place the bottles and dropper parts (separate the pipette from the rubber bulb if possible) in the pot.
- Bring the water to a rolling boil and let them boil for 10 minutes.
- Use tongs to carefully remove parts and place them on a clean, lint-free cloth to air dry.
- Keep the pipettes upright and avoid submerging rubber bulbs fully to prevent damage.
| Pros | Cons |
|---|---|
| Kills most bacteria & viruses | Can damage rubber bulbs |
| Easy and requires no chemicals | Risk of thermal shock cracking |
| No chemical residue | Takes time to cool and dry |
Effectiveness: Boiling for 10 minutes kills most bacteria and viruses, including common pathogens found on glass and droppers. It’s a reliable way to sanitize before filling tinctures or oils.
This method is ideal for glass bottles and pipettes without rubber parts or where bulbs can be removed beforehand. For assembled droppers, consider other methods to avoid melting or warping components.
6 Proven Methods to Sterilize Dropper Bottles (Ranked by Effectiveness)
Method 2: Isopropyl Alcohol 70–99% Rinse + Air Dry
Using isopropyl alcohol (rubbing alcohol) between 70% and 99% is a great way to sterilize dropper bottles, especially those with silicone bulb droppers that can’t handle heat well. Alcohol kills bacteria and viruses quickly without damaging rubber or silicone parts.
How to do it right:Fill the bottle and dropper parts with alcohol, making sure the inside of the pipette and the bulb are fully wet. Swish the alcohol around for about 30 seconds to 1 minute to disinfect all surfaces. Rinse the bottle with sterile water if you want, but usually, letting it air dry is enough. Prop the bottle and droppers somewhere clean with good airflow to avoid trapping alcohol inside the bulb.Avoiding alcohol trapped in the bulb:Squeeze the silicone bulb a few times after soaking to flush out any stuck alcohol. Hold the bottle upside down during drying; this helps alcohol evaporate out of narrow spaces. Don’t seal the bottles until fully air-dried to prevent any leftover alcohol vapors from trapping inside.Evaporation time of isopropyl alcohol:
| Concentration | Evaporation Time (Room Temp) | Notes |
|---|---|---|
| 70% | 3–5 minutes | Enough for sterilization |
| 91% | 1–3 minutes | Dries faster, stronger |
| 99% | Under 1 minute | Very fast evaporation |
Isopropyl alcohol rinse is a quick, easy, and effective way to sanitize glass dropper bottles and keep silicone bulbs intact. Just remember to let everything dry thoroughly before use to avoid any alcohol taste or residue.
6 Proven Methods to Sterilize Dropper Bottles (Ranked by Effectiveness)
Method 3: Dishwasher Sanitize Cycle (Top Rack Only)
Using the dishwasher sanitize cycle can be a quick way to clean dropper bottles, especially glass ones. Place bottles and droppers only on the top rack to avoid warping or melting any plastic or rubber parts.
When it Works:
- The sanitize cycle usually heats water to around 150–160°F (65–70°C).
- It’s good for killing some bacteria and viruses on glass bottles.
- Best for glass bottles without rubber bulbs or delicate parts.
Temperature Requirements:
- True sterilization requires at least 160°F (70°C) sustained for several minutes.
- Commercial dishwashers hit these temps easily; home units often fall short.
Why Most Home Dishwashers Aren’t Hot Enough:
- Most standard home dishwashers max out around 140°F (60°C).
- They sanitize but don’t fully sterilize—meaning some microbes might survive.
- If you want complete sterilization at home, dishwasher sanitize alone likely isn’t enough.
For quick cleaning and reducing germs, the dishwasher sanitize cycle is convenient—but for full sterilizing, consider boiling, steam, or alcohol methods instead.
6 Proven Methods to Sterilize Dropper Bottles (Ranked by Effectiveness)
Method 4: Steam Sterilization (Pressure Cooker or Instant Pot)
Steam sterilization is like having a mini-autoclave right in your kitchen. Using a pressure cooker or an Instant Pot, you can reach the magic sterilizing zone—121 °C (250 °F) at 15 psi pressure—which effectively kills bacteria, viruses, and spores fast.
How to do it:
- Place your glass dropper bottles (remove any rubber bulbs or plastic parts that can melt) inside the cooker on a steam rack.
- Add about 1–2 inches of water but make sure the bottles aren’t submerged—steam does the work here.
- Seal and bring the cooker up to pressure.
- Maintain 15 psi for about 15-20 minutes (this is the key sterilizing window).
- After the cycle, turn off heat and let pressure naturally release—don’t open it right away to avoid thermal shock cracks.
- Carefully remove bottles and place them on a clean towel or rack to cool and dry.
Why this works:
- Steamy heat at pressure penetrates all surfaces, reaching places boiling water can miss.
- It’s reliable for deep sterilization like labs use but doable at home.
Tips:
- Use silicone or heat-safe pipettes if you want to sterilize whole droppers, but beware of damage to plastic parts otherwise.
- Don’t rush the cooling; sudden temp changes can crack glass.
- This method is perfect for commercial-quality cannabis tincture bottles or essential oil uses needing high-level sterilization.
Steam sterilization is a solid, proven way to clean your dropper bottles without chemicals—just time and heat.
6 Proven Methods to Sterilize Dropper Bottles (Ranked by Effectiveness)
Method 5: Hydrogen Peroxide + Hot Water Soak
Using hydrogen peroxide with a hot water soak is a solid way to sterilize glass dropper bottles at home, especially if you want an alternative to boiling or alcohol. Here’s how it works and what to keep in mind:
Food-grade hydrogen peroxide is available in two main strengths:3% solution (common, easy to find, safe for home use) 35% solution (much stronger, mostly for commercial or lab use and requires serious safety gear)For home use, stick with 3% food-grade peroxide. It’s effective at killing bacteria, viruses, and fungi when combined with a hot water soak (around 120°F to 140°F).How to do it:Rinse bottles and droppers first. Fill a heat-safe container with hot water and add enough 3% hydrogen peroxide to make a 3–5% solution. Submerge the bottles and parts completely for 15–20 minutes. Rinse thoroughly with sterile or boiled water afterward to remove residual peroxide.Safety notes:Never use 35% peroxide without training and protective equipment—it’s corrosive and dangerous. Avoid letting peroxide sit inside silicone or rubber bulbs too long to prevent degradation.Neutralizing residue:
Any leftover hydrogen peroxide breaks down naturally into water and oxygen, so extended rinsing with sterile water is enough to clear it out—no harsh chemicals needed.
This method is a good mid-level sterilization option for prepping glass bottles for essential oils, tinctures, or other sensitive liquids where you want to avoid heat damage but still need strong sanitization.
Method 6: Dry Heat Oven Method (Glass Only – No Pipettes)
The dry heat oven method is great for sterilizing glass dropper bottles without any plastic parts like pipettes or rubber bulbs. Set your oven to 160–170 °C (320–338 °F) and bake the bottles for about 2 hours. This high, steady heat kills most bacteria and viruses by essentially baking them out.
Important: Only use this on glass bottles. Remove any child-resistant caps, pipettes, or rubber bulbs before placing them in the oven, as heat can damage or melt these components.
Use this method when you want a thorough sterilization without water or chemicals—ideal if you’re prepping bottles for sensitive tinctures or essential oils and have glass-only components. Just be sure your oven heats evenly and you handle bottles carefully after heating to avoid thermal shock or burns.
This approach offers a reliable sterilization option, ensuring your glass bottles are microbe-free and ready for safe filling, especially useful for those prepping dropper bottles for cannabis tinctures or CBD oils.
How to Remove Factory Odor & Chemical Smell from New Glass
New dropper bottles sometimes have a strong plastic or chemical smell straight from the factory. Getting rid of that odor is important, especially for tinctures, essential oils, or CBD products. Here are some simple, effective ways to clear out that factory smell before you start filling your bottles:
Baking Soda + Vinegar Overnight Soak
- Mix warm water with a few tablespoons of baking soda and a splash of white vinegar.
- Fill the bottles and let them soak overnight.
- The fizz helps neutralize odors and lifts residue.
- Rinse thoroughly with clean water afterward.
Lemon Juice Rinse
- Lemon juice is great at cutting through chemical smells and leaves a fresh scent.
- Swirl lemon juice inside the bottles or soak them for a couple of hours.
- Rinse well before drying or sterilizing.
Activated Charcoal Trick
- Activated charcoal absorbs odors naturally.
- Place a small pouch of activated charcoal inside the bottle or near sealed caps for a day or two.
- This method is perfect if you want a chemical-free option without soaking.
Using these quick fixes will help clean new tincture bottles before use so your product stays fresh and free from off smells.
Special Considerations for Cannabis & CBD Tincture Bottles
When working with cannabis or CBD tincture bottles, microbial cleanliness isn’t just nice to have—it’s critical. Unlike some products, ethanol-based extracts aren’t fully self-preserving. That means bacteria and mold can still grow if the bottles and droppers aren’t properly sterilized before filling.
For micro-brands and small commercial producers, the best method is a mix of boiling water sterilization for the glass bottles combined with a 70–99% isopropyl alcohol rinse on the droppers, especially those with silicone bulbs. This combination ensures you’re killing both surface and hidden bacteria without damaging parts. Hemployd.com customers often rely on this “GMP-light” approach, which balances cleanliness with efficiency and cost-effectiveness.
Following simple good manufacturing practices (GMP) like clean workspace, sanitized tools, and proper drying and storage will keep your cannabis tincture bottles safe, fresh, and professional-looking for U.S. markets.
Common Mistakes That Ruin Dropper Bottles
When sterilizing and cleaning dropper bottles, watch out for these common mistakes that can damage your bottles or affect your product quality:
-
Thermal Shock Cracking:
Avoid sudden temperature changes, like plunging hot glass bottles into cold water. This can cause glass to crack or break, ruining your bottles.
-
Melting Rubber Bulbs:
Rubber or silicone droppers can melt or deform if exposed to high heat, especially during boiling or oven sterilization. Always remove the bulb before applying high heat methods.
-
Soap Residue Affecting Taste:
Using scented soaps or not rinsing thoroughly can leave residue inside bottles. This changes the flavor or smell of tinctures and oils, especially for CBD or cannabis tincture bottles.
Keeping these mistakes in mind will help you maintain clean, safe, and high-quality dropper bottles ready for use.
How to Store Sterilized Bottles Until Filling
Once your dropper bottles are sterilized, keeping them clean until filling is key. Here’s how to store them right:
- Use lint-free packing: Wrap bottles in lint-free cloth or place them in clean, sealed bags to avoid dust and fibers.
- Keep away from sunlight: Store bottles in a dark spot or use UV-blocking containers to prevent light exposure that can degrade contents later.
- Seal openings: If you sterilized bottles separately from droppers, keep caps and pipettes sealed tightly to stop airborne contamination.
- Avoid moisture: Store in a dry area to prevent mold or mildew forming inside the bottles.
- Clean storage space: Make sure your storage shelf or box is wiped down regularly.
Following these simple steps ensures your sterilized glass dropper bottles stay ready for safe, clean use when it’s time to fill them.
FAQ on Sterilizing Dropper Bottles
Can I sterilize assembled dropper bottles?
It’s best to sterilize the bottle and dropper parts separately. The pipette bulbs and caps can trap moisture or sterilizing agents, making it harder to fully dry or clean inside. Assembled bottles risk leftover liquid inside, which can affect sterilization and promote bacteria growth.
Is 91% isopropyl alcohol better than 70%?
Not necessarily. While 91% alcohol evaporates faster, 70% is more effective at killing bacteria and viruses because it contains more water, which helps break down cell walls. For dropper bottles, 70% is usually the best balance for sterilization.
How do professionals sterilize thousands of bottles?
Labs and commercial packagers use industrial autoclaves or large sterilizing tunnels that combine steam under pressure and heat for rapid, thorough sterilization. They also rely on validated chemical washes and dry heat ovens to ensure batch consistency. This isn’t practical at home but ensures top-level cleanliness for large runs.
Are hemployd.com dropper bottles pre-washed?
Yes, hemployd.com bottles come pre-washed, reducing the need for heavy cleaning before use. However, we recommend a simple rinse or one of the sterilization methods discussed to ensure your bottles are perfectly clean and safe for filling, especially for sensitive products like cannabis or CBD tinctures.