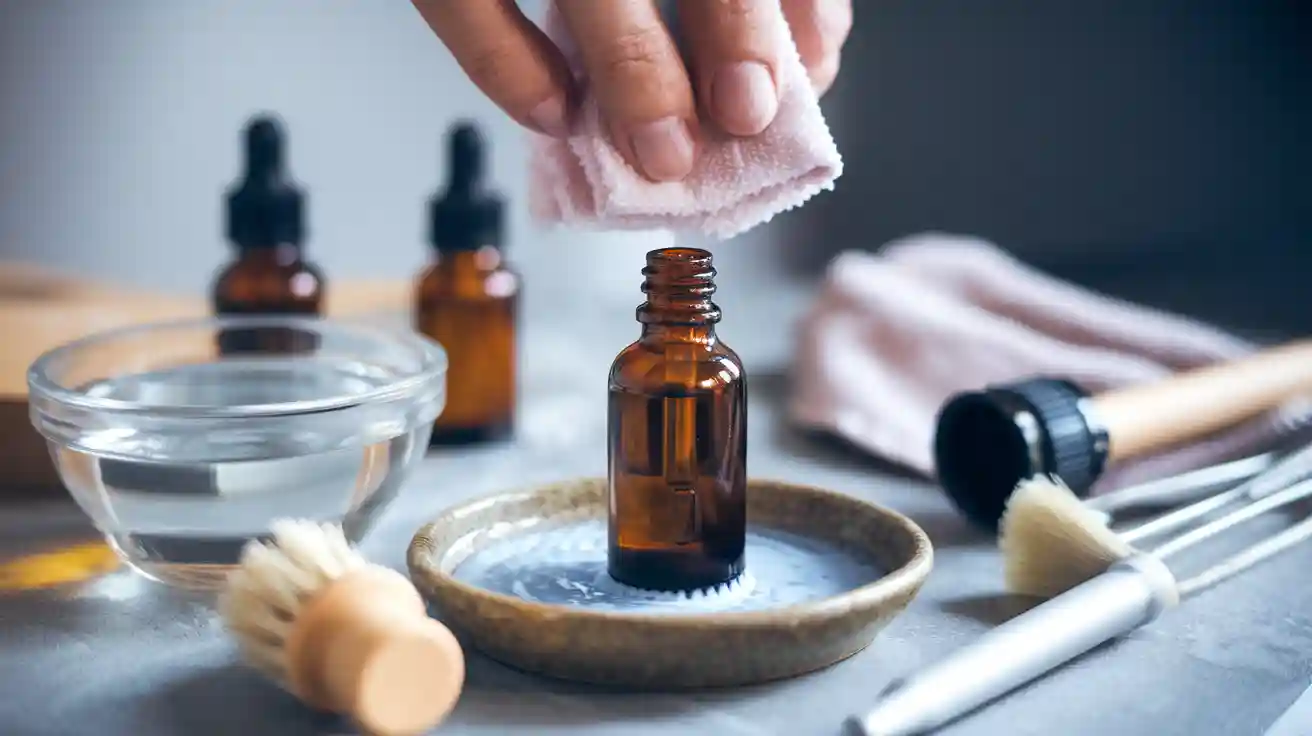
It’s very important to keep dropper bottles clean. Dirt or germs can spoil your products and cause bacteria to grow. This can make the product less effective and expire faster. Cleaning them the right way keeps them safe and usable longer. Using a step-by-step guide and safety tips helps a lot.
Key Takeaways
Collect all the supplies you need to clean bottles. Use hot water, gentle dish soap, and a bottle brush. Being ready makes cleaning faster and better.
Take apart the dropper bottles before washing them. This helps clean every part, like the rubber bulb, well. It also removes germs.
Let the bottles air-dry on a clean towel after washing. Drying them properly stops mold or bacteria from growing.
Gathering Supplies for Cleaning Dropper Bottles

Tools and materials you’ll need
Get all your supplies ready before cleaning. Being prepared makes it easier and ensures you don’t skip anything. Here’s what you’ll need:
Hot water: Helps remove dirt and leftover residue.
Mild dish soap: Gentle soap cleans without leaving harmful stuff.
Bottle brush: Cleans the inside of dropper bottles well.
Small toothbrush or cleaning brush: Cleans the dropper and cap in small spaces.
Isopropyl alcohol (70%) or hydrogen peroxide: Great for killing germs and sanitizing.
Clean towel: Use it to dry the bottles after washing.
Take apart the dropper bottles before cleaning. Remove the rubber parts since they can hold bacteria. Cleaning each part separately ensures everything is spotless.
Picking safe cleaning products
Choosing the right cleaners keeps your bottles safe and reusable. Mild dish soap is a good choice. It removes oils and dirt gently but effectively. For sanitizing, use isopropyl alcohol or hydrogen peroxide. Both kill germs and keep bottles safe to use again.
If you like natural cleaners, vinegar is a great option. It disinfects well and is eco-friendly. For a deeper clean, boil the bottle parts in water for 10 minutes. This works best for glass bottles.
Using these cleaners keeps your bottles clean and lasts longer. Plus, reusing clean bottles helps reduce waste and is better for the planet.
Getting Dropper Bottles Ready to Clean
Emptying and taking apart pieces

Before cleaning, make sure the dropper bottles are empty. Pour any leftover liquid into a safe container or throw it away properly. This is very important if the bottle had strong liquids like essential oils that might leave residue.
Then, take the bottle apart. Remove the dropper, rubber bulb, and other parts that come off. Taking apart the pieces helps you clean every small area. Pay close attention to the rubber bulb because it can hold dirt and germs. If there’s a label on the bottle, peel it off now to make cleaning easier later.
Tip: Keep all the parts together on a clean towel or in a small container. This way, you won’t lose any pieces while cleaning.
Advice for handling fragile parts
Some parts, like the rubber bulb or glass pipette, are delicate. Be gentle to avoid breaking them. Don’t stretch or twist the rubber bulb too much when cleaning. Hold glass pipettes carefully but not too tightly to avoid cracks.
Use a soft brush or small toothbrush for tiny spaces. These tools clean well without scratching or damaging the parts. If you’re cleaning glass bottles, remember they can be slippery when wet. Dry your hands or wear gloves to hold them better.
Why this is important:
Clean bottles keep the product inside safe.
Preparing bottles well helps clean them thoroughly.
By emptying and taking apart your dropper bottles, you’re getting them ready for a deep clean. Plus, you’re helping the environment by reusing your bottles.
Removing Labels from Dropper Bottles
Soaking bottles to loosen labels
Removing labels from dropper bottles can feel tricky, but soaking them makes it much easier. Start by filling a bowl or sink with warm, soapy water. Use a mild dish soap for this step. Place the bottles in the water and let them soak for about 15–20 minutes. This softens the adhesive and loosens the label.
If the label doesn’t peel off easily after soaking, don’t worry. You can try soaking it a little longer or gently rubbing the edges with your fingers. For stubborn labels, a soft sponge or cloth works wonders. Avoid using anything sharp that could scratch the bottle.
Tip: If you’re working with glass bottles, adding a splash of white vinegar to the water can help break down the adhesive faster.
Removing adhesive residue safely
Once the label is off, you might notice sticky residue left behind. To remove it, grab some isopropyl alcohol or a natural option like coconut oil. Apply a small amount to a cloth or paper towel and rub the sticky area gently. The residue should come off quickly.

For tougher spots, baking soda mixed with a little water creates a gentle scrub. Rub it on the residue, then rinse with warm water.
Note: Always test cleaning solutions on a small area first to make sure they don’t damage the bottle.
By soaking and using safe cleaning methods, you’ll have label-free bottles ready for the next step!
Cleaning Essential Oil Bottles and Other Dropper Bottles
I remember helping a client who ran a small handmade skincare brand. She was using dropper bottles for facial oils but noticed the scents and textures were changing too quickly. We walked through her cleaning routine, and it turned out the neck of the bottle wasn’t getting scrubbed enough. Once she started using a soft-bristle brush and soaking them longer, she told me her customers actually commented on how much fresher the product smelled. It really reminded me how the smallest details matter—especially when it comes to essential oil residue.
Washing and scrubbing the bottles
When it comes to cleaning essential oil bottles, washing them properly is the first step. Start by filling a bowl with warm water and adding a few drops of mild dish soap. Swirl the water to create suds. Place the bottles and their parts into the soapy water. Let them soak for about 10 minutes. This helps loosen any leftover essential oils or residue.
Next, grab a bottle brush or a small toothbrush. Use it to scrub the inside of the bottles gently. Pay extra attention to the neck of the bottle, as oils often collect there. For the dropper and rubber bulb, use a smaller brush to clean those hard-to-reach areas. If you’re cleaning essential oil bottles with stubborn residue, try adding a pinch of baking soda to your brush for extra scrubbing power.
Tip: Always handle glass bottles carefully during the cleaning process to avoid accidental breaks.
Rinsing thoroughly to remove residue
After scrubbing, rinse each part under warm running water. Make sure to remove all soap and residue. Any leftover soap can mix with essential oils and affect their quality. Hold the bottles at an angle to let the water flow through every corner.
For a final rinse, you can use distilled water. This prevents mineral spots from forming on the glass. Once rinsed, inspect the bottles to ensure they’re completely clean. If you spot any leftover residue, repeat the cleaning process for those areas.
By washing and rinsing thoroughly, you’ll have clean essential oil bottles ready for sterilization or reuse. This step is crucial for maintaining the quality of your oils and ensuring the bottles are safe to use again.
Sterilizing Dropper Bottles
Boiling method for glass bottles
Boiling glass dropper bottles is easy and works well. Fill a pot with enough water to cover the bottles and parts. Heat the water until it boils. Before boiling, make sure the bottles are clean and have no residue. Once boiling, gently place the bottles, droppers, and rubber bulbs into the pot. Let them boil for 10 minutes to kill bacteria and make them safe to use again.
After boiling, use tongs to take out the bottles and parts. Put them on a clean towel to cool and dry. Be careful not to touch the hot glass to avoid burns. This method is best for glass bottles because plastic ones can melt or change shape.
Tip: Check the bottle instructions to see if boiling is safe for them.
Using alcohol or sanitizing solutions
If boiling isn’t possible, use alcohol or sanitizing solutions instead. Take isopropyl alcohol (70%) or a similar cleaner. Pour a little inside the bottle and swirl it around to clean. Soak the dropper and rubber bulb in alcohol for a few minutes. This kills germs and keeps the bottles ready to reuse.
After sanitizing, rinse the bottles with distilled water to remove alcohol traces. Let them dry on a clean towel. This ensures the bottles are fully clean and safe for your next use.
By using these sterilizing methods, your bottles will stay clean and last longer.

Drying and Storing Clean Dropper Bottles
Air-drying to prevent contamination
After the cleaning process, drying your dropper bottles properly is essential. Air-drying is the best way to prevent contamination. Lay a clean towel on a flat surface, like a countertop or table. Place the bottles and their parts on the towel, ensuring they don’t touch each other. This allows air to circulate freely around each piece, helping them dry faster and more thoroughly.
Avoid using paper towels or tissues to dry the bottles. These can leave behind fibers or dust, which might stick to the inside of the bottle. If you’re in a hurry, you can use a hairdryer on a low, cool setting. Hold it at a safe distance to avoid damaging delicate parts.
Tip: Make sure the bottles are completely dry before storing them. Even a small amount of moisture can lead to mold or bacteria growth.
Proper storage techniques for reuse
Once your bottles are clean and dry, proper storage is the next step. Store them in a cool, dry place away from direct sunlight. Sunlight can weaken the material and affect the quality of the bottles over time. Use a clean, airtight container to keep dust and dirt away.
If you have multiple bottles, organize them by size or type. This makes it easier to find the one you need. For bottles with rubber bulbs, store them upright to prevent the rubber from sticking or deforming.
Label your bottles if you plan to reuse them for specific products. This avoids confusion and ensures you always know what’s inside. Proper storage keeps your bottles clean and ready for their next use.
By following these steps, you’ll extend the life of your dropper bottles and maintain their cleanliness for future use.
Reuse and Recycling of Dropper Bottles
I personally love turning clean dropper bottles into mini plant feeders. I’ve used them for my herbs at home—just fill one with diluted plant food and squeeze a few drops at the base. It feels great giving the bottle a second life instead of tossing it, and it adds a personal touch to my little indoor garden.
Fun ways to reuse clean essential oil bottles
After cleaning your bottles, you can use them again in cool ways. Here are some ideas to try:
DIY Blends and Recipes: Make your own oil mixes. Add a few drops of essential oils to a carrier oil for a unique scent or massage oil.
Travel-Size Containers: Use the bottles to carry small amounts of shampoo, lotion, or hand sanitizer when traveling.
Plant Care: Fill them with water or plant food to water tiny plants. The dropper helps control how much you use.
Craft Projects: Store and apply liquid paints, dyes, or glue for art projects.
Aromatherapy Sprays: Add a spray top to make room sprays or fabric mists with essential oils.
Reusing bottles saves money and reduces waste. It also gives the bottles a new purpose.
Recycling tips for old or broken bottles
If your bottles are too old or broken to reuse, recycle them instead. First, check the material. Glass bottles can usually be recycled, but take off any rubber or plastic parts first. Separate these pieces and recycle them based on local rules.
For plastic bottles, look at the recycling symbol on the bottom. This shows if they can be recycled in your area. If you’re not sure, ask your local recycling center. Some places even have special programs for essential oil containers.
Tip: If rubber bulbs can’t be recycled, use them for other tasks like applying glue or cleaning small spaces.
Recycling keeps trash out of landfills and helps the planet. By reusing or recycling, you’re helping the environment and making the most of your bottles.
Cleaning dropper bottles is simple if you follow steps. This keeps your bottles safe and ready to use again. Cleaning well stops germs from growing and keeps products fresh. Reusing clean bottles helps reduce waste and protects the environment. Small actions can make a big difference for your products and the Earth.
FAQ
How often should you clean dropper bottles?
Clean dropper bottles after each use. This is extra important if you’re using them for different products. Regular cleaning stops germs and keeps bottles safe to reuse.
Can you clean plastic dropper bottles like glass ones?
Yes, but don’t boil plastic bottles. Wash them with warm soapy water. Use sanitizing solutions to clean without harming the plastic.
What’s the best way to clean tough essential oil residue?
Make a paste with baking soda and water. Use a brush to scrub the residue gently. Rinse well to leave the bottle clean and shiny.
Tip: Test cleaning methods on a small spot first to avoid damage.
After cleaning a dropper bottle, how can you ensure it is completely dry inside to prevent mold growth?
Drying is a critical step in the cleaning process, as residual moisture can pose hygiene risks.


